Service Providers
Service Providers (also referred to as Maintenance Companies) are managed at an organisational level. This means any Service Providers you configure here will be available organisation-wide.
Accessing the Service Providers Menu
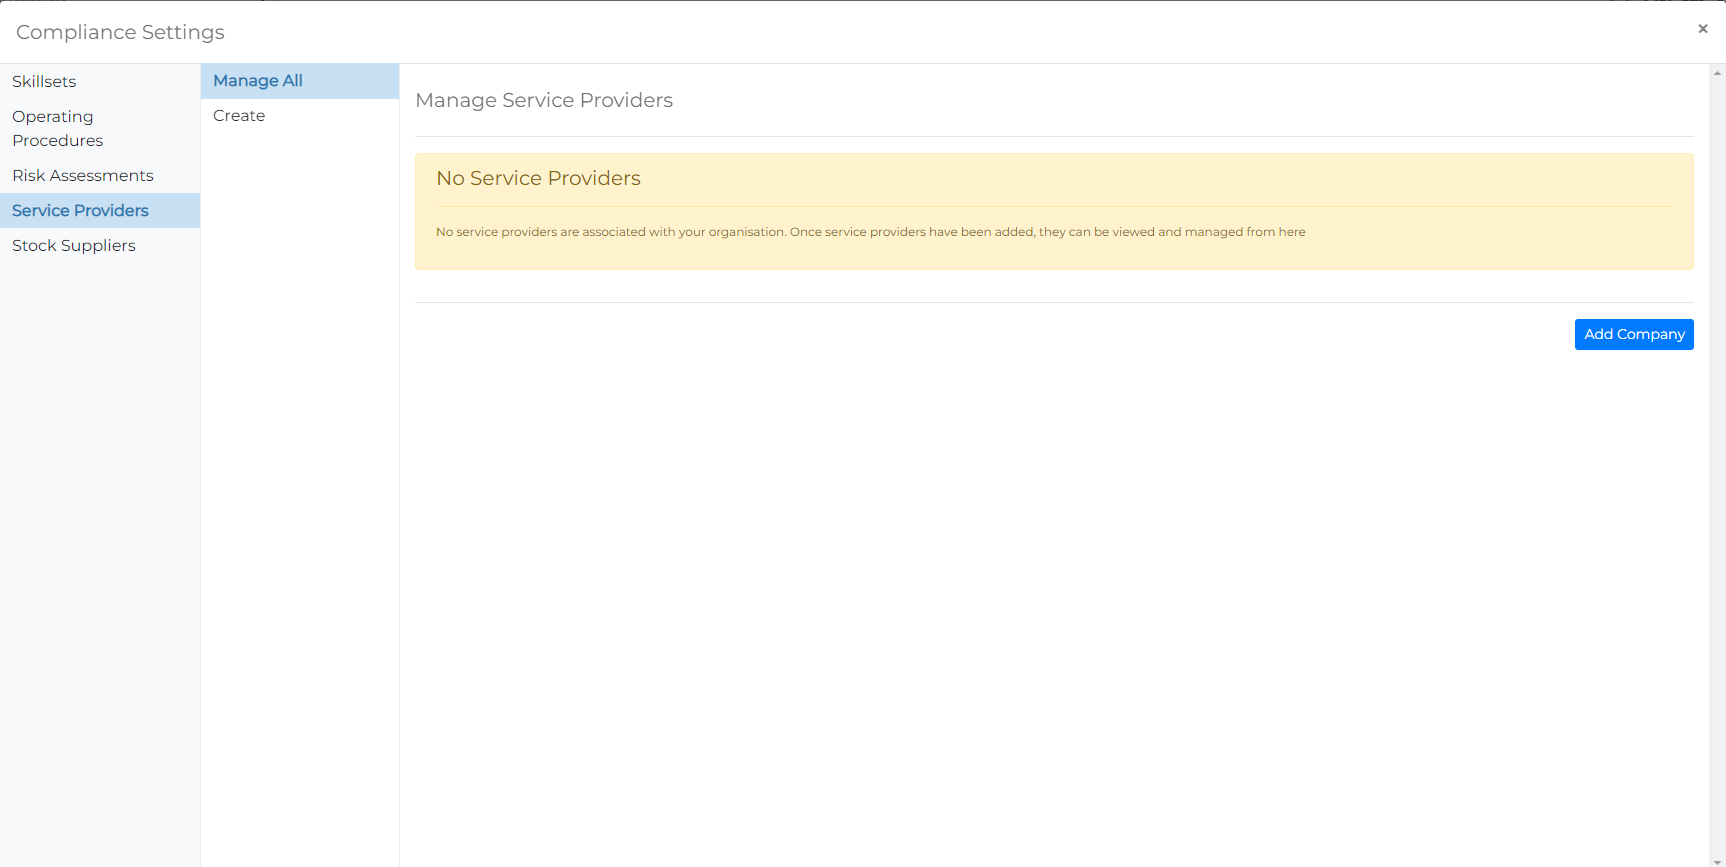
You can access the Service Provider management page from the Settings Menu. Select the 'Service Providers' option, then from the sub-menu, click Manage All to view your organisation's list of Service Providers.
Adding a Service Provider
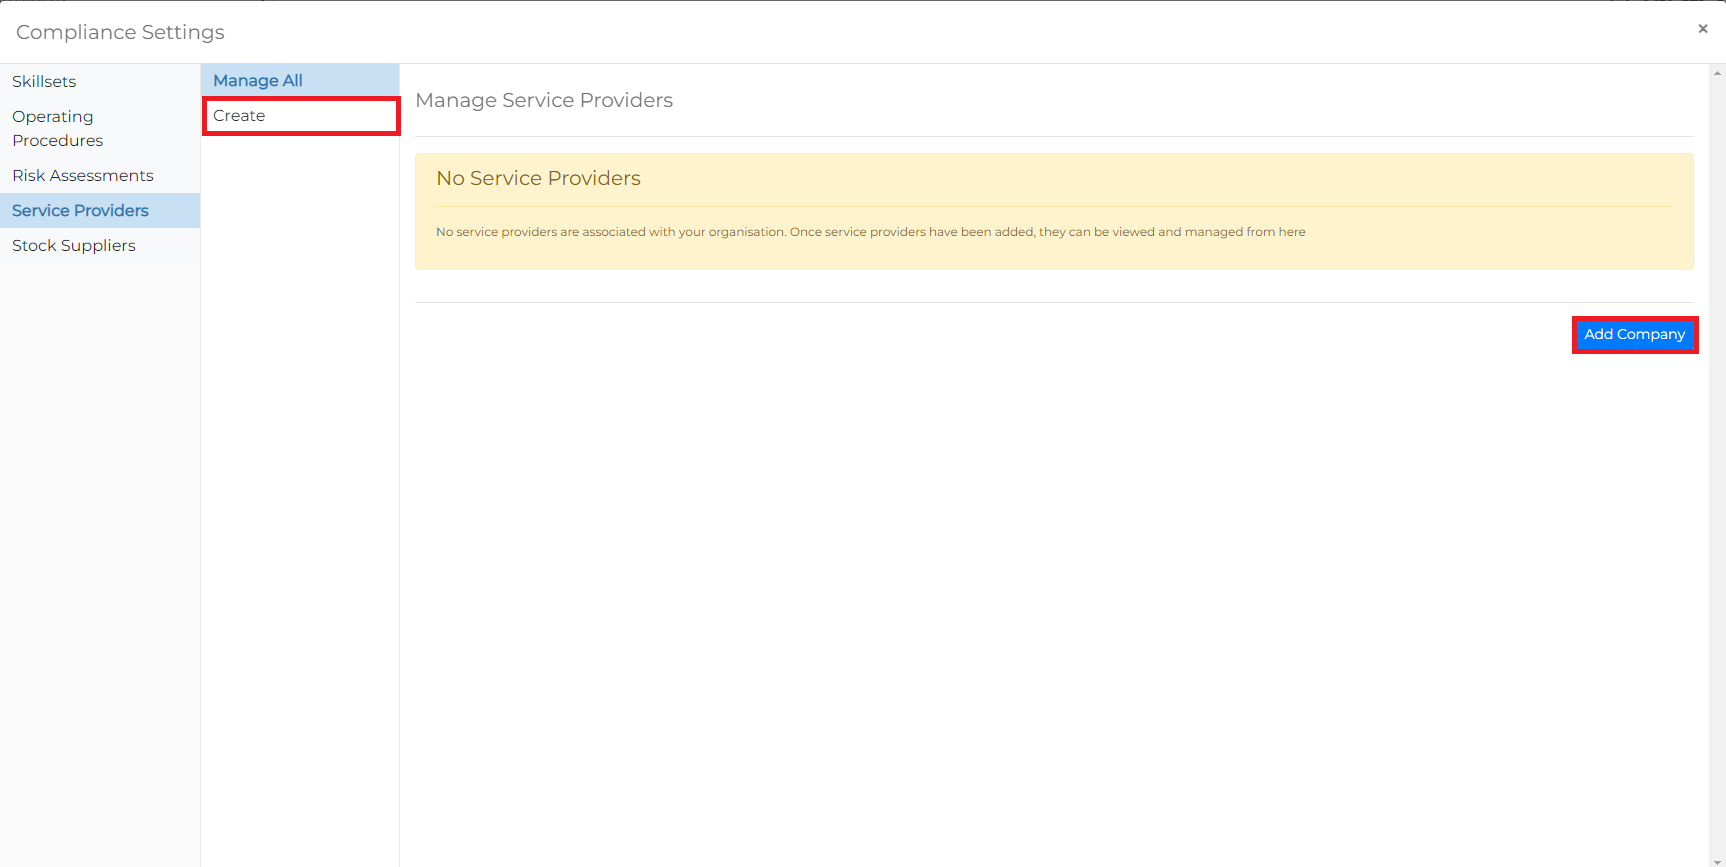
With the Service Providers menu selected, either select the Create option from the sub-menu or click the Add Company button at the bottom right of the content view.
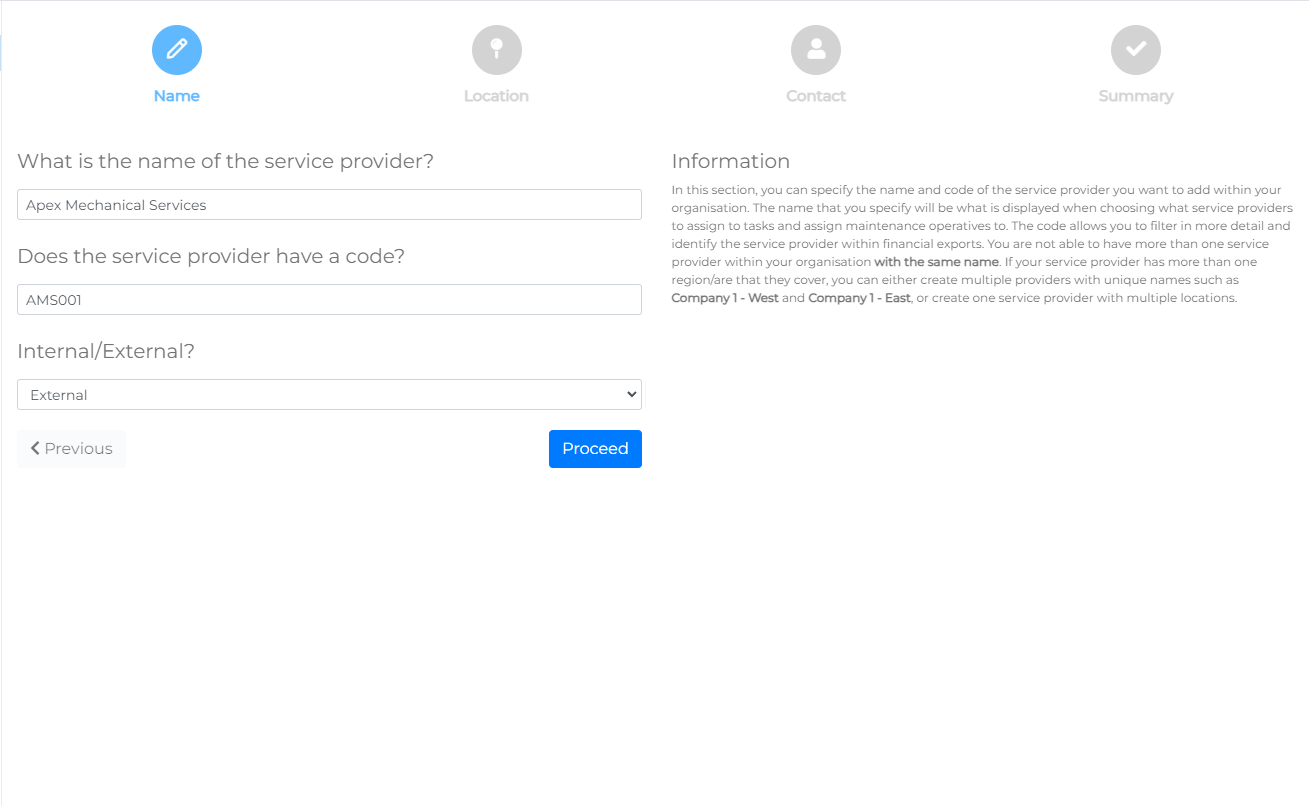
Creating a service provider uses a wizard to guide you through the steps:
- Name – Enter the name/reference and specify whether the company is external or internal (such as a subsidiary of your organisation).
- Location – Provide the office reference and address.
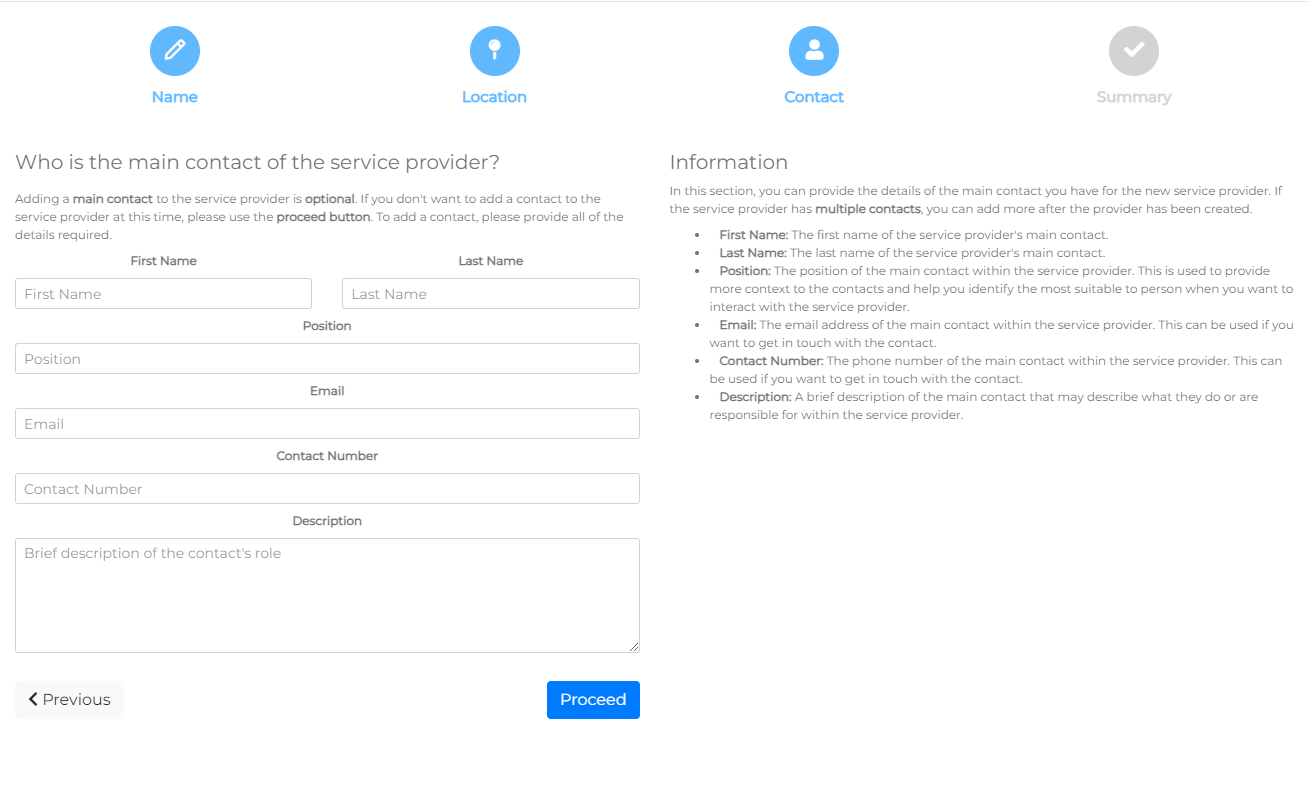
- Contact – Add the name and contact details of your main contact within the company.
- Summary – Review the details before saving.
Start by adding the name of the Service Provider and a reference code. This is required; if you don't already have an internal code, this is an opportunity to create one. Codes must be unique within your organisation. Attempting to create a duplicate reference code will cause the process to fail and require restarting.
The Internal/External option helps when associating a service provider with a task (e.g., a task will expect either an internal or external operative).
Click Proceed to move to the next step.
Specify the location of the service provider, including a name (e.g., 'Main Office', 'Local Branch', etc.) and an address. The service provider's address will be used for any correspondence generated by the system.
Click Proceed to continue.

Provide a contact for the service provider at this stage. You can add more contacts later, as well as adding operatives to allow access for logging maintenance activities.
Click Proceed to proceed to the summary.
In the final summary, review all details before clicking Proceed to save the Service Provider.
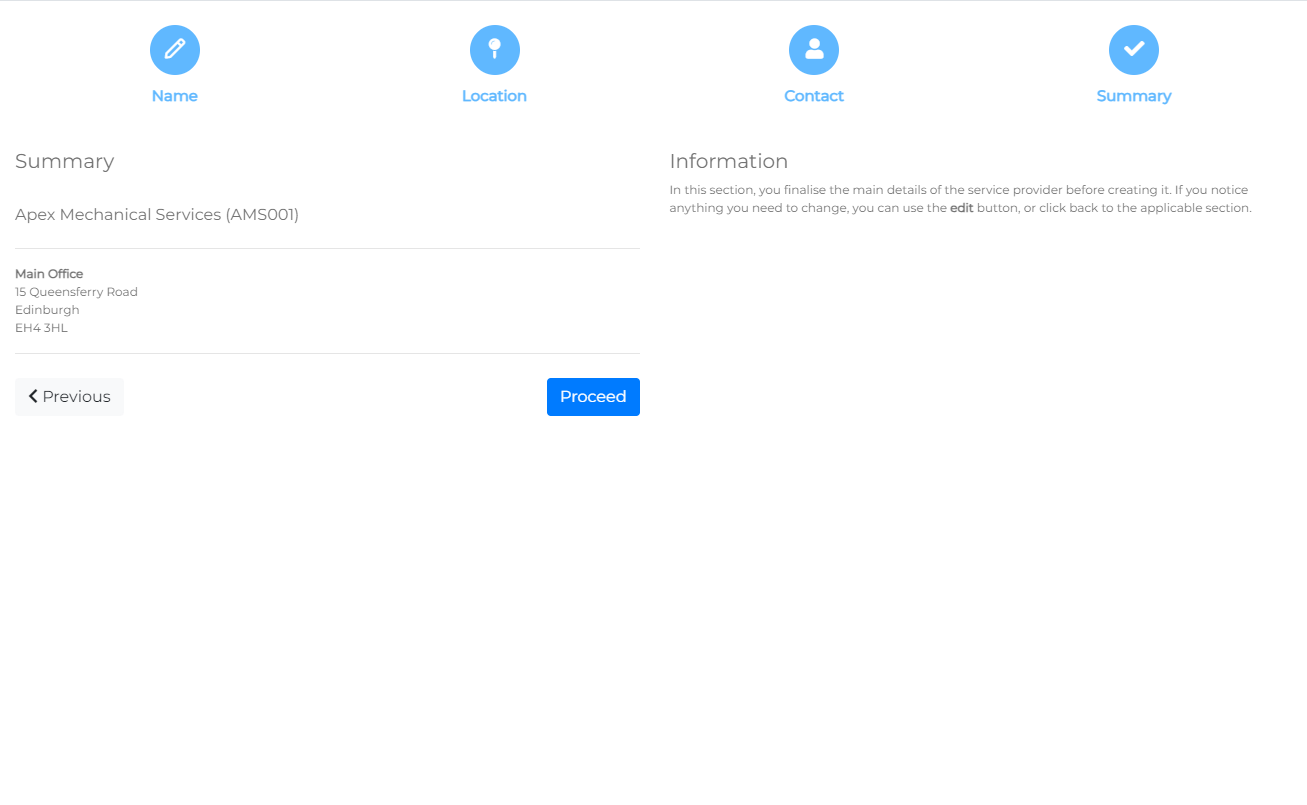
A success message, Company Created, will display to confirm that the company has been created.

Managing a Service Provider
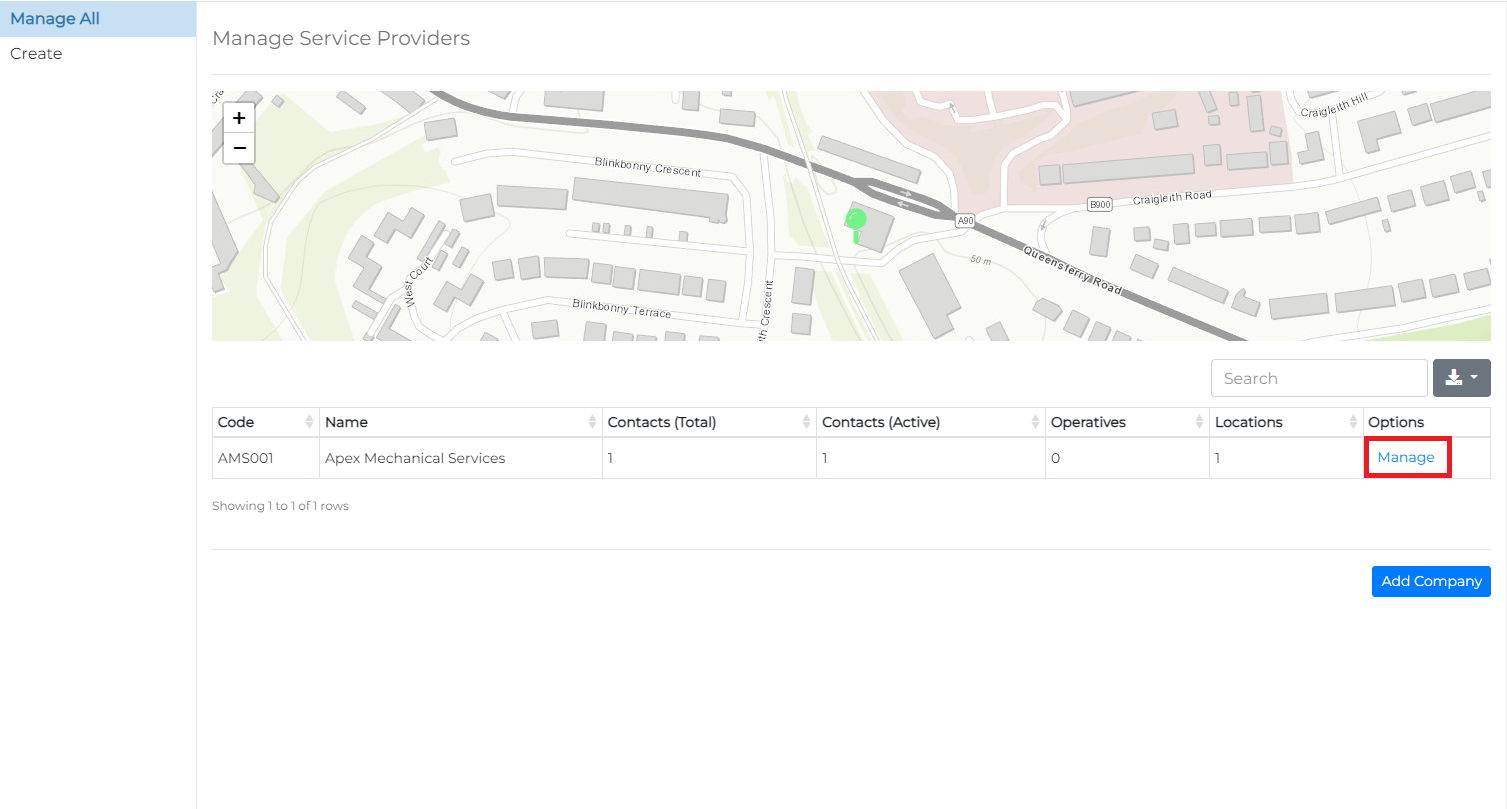
You will then be redirected to the Manage All view. This displays a list of all Service Providers associated with your organisation, showing their locations on a map.
Each row in the table displays the service provider's code, name, number of contacts, active contacts, operatives, and locations, as well as a Manage link. Click Manage to access the service provider management menu.
From the management page, you can update the service provider name, contacts, locations, and manage insurance certificates for the company.
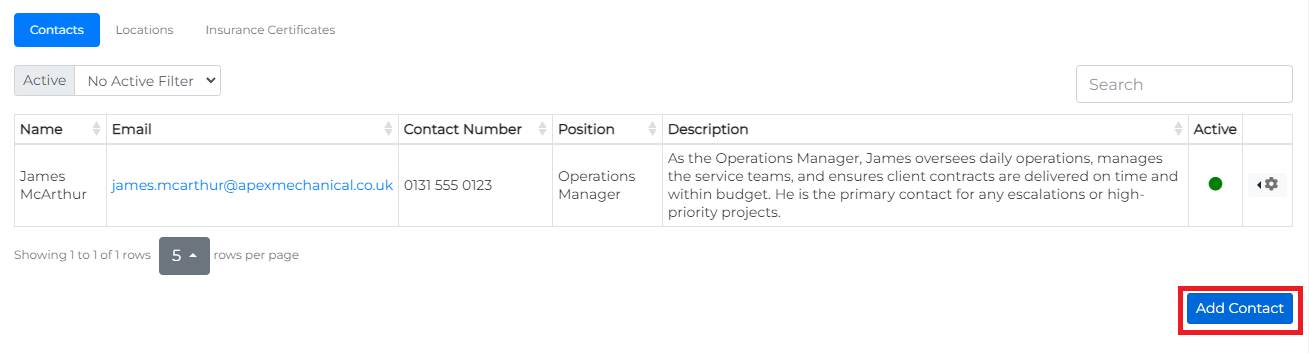
Manage Contacts
Contacts can be managed from the Contacts tab. This view displays a table of all contacts associated with the service provider.
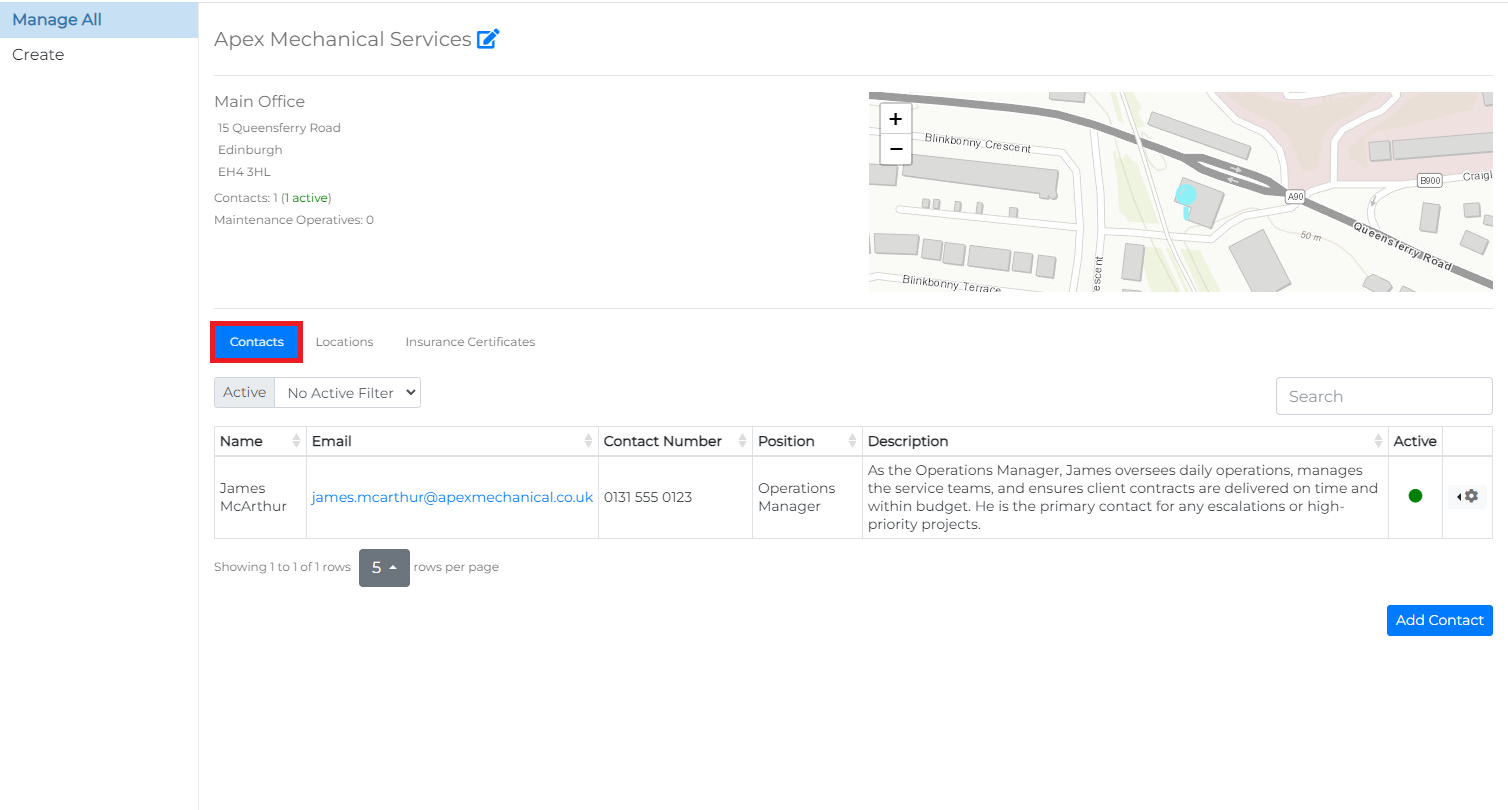
Clicking on the icon opens a menu with options to:
- Edit Details – Update contact details.
- Deactivate – Flag the contact as disabled, preventing changes to their details.
- Delete – Permanently remove the contact.

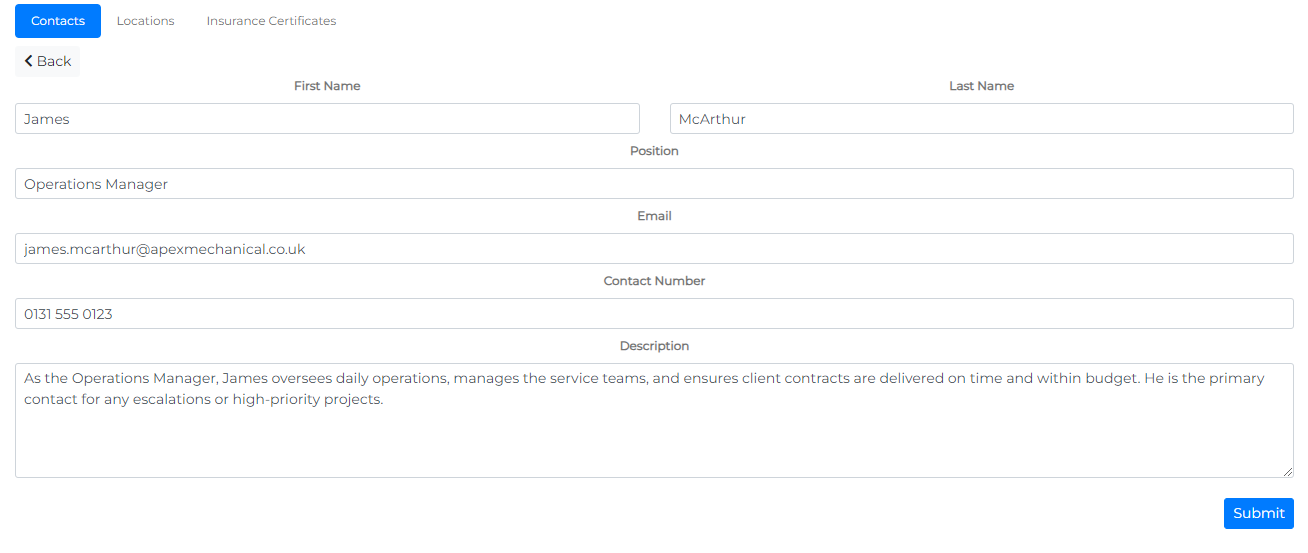
Adding a Contact
To add a contact, click the Add Contact button at the bottom right of the contacts table.
Complete all fields in the contact form, then click Submit to add them to the Service Provider.
Manage Locations
Locations are managed from the Locations tab. A location represents a site where the service provider operates. When raising a Purchase Order, you can select one of these addresses.
Clicking on the icon opens a menu with an option to edit location details.
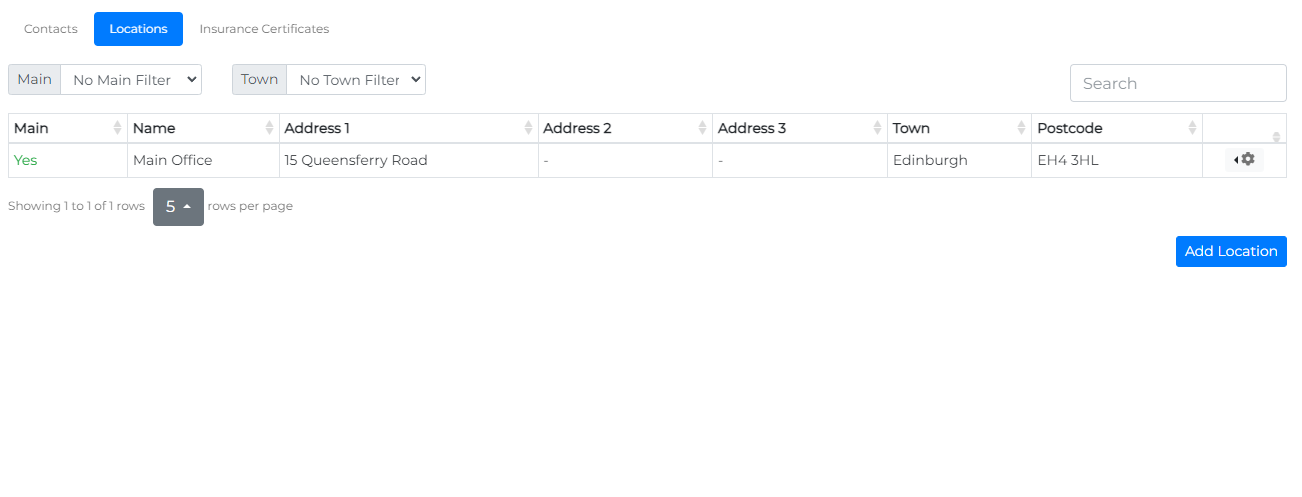
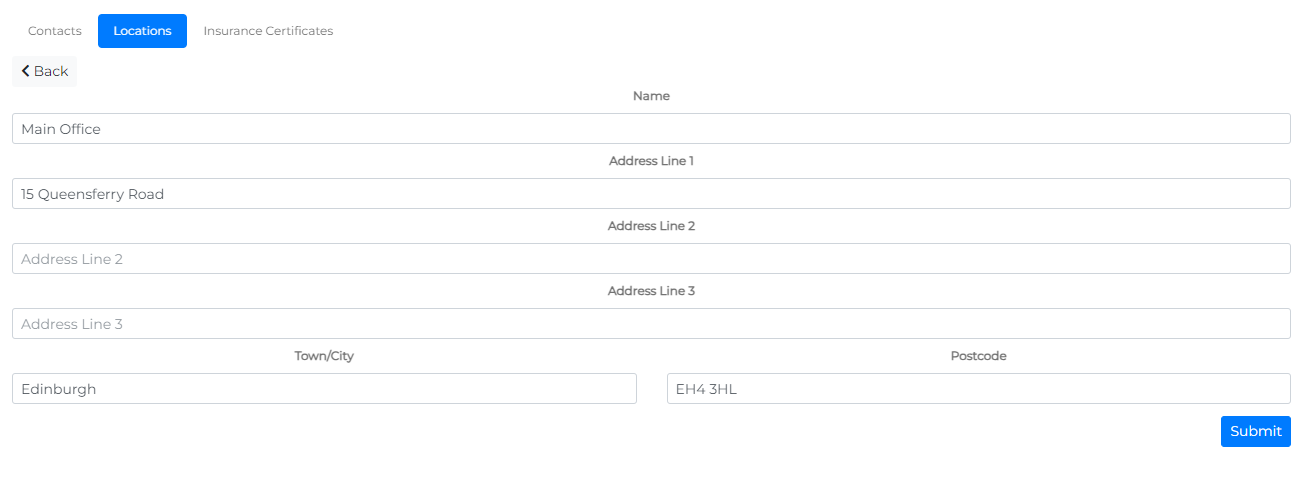
Adding a Location
To add a location, click the Add Location button at the bottom right of the locations table. Fill out the location details and click Submit to add it to the Service Provider.
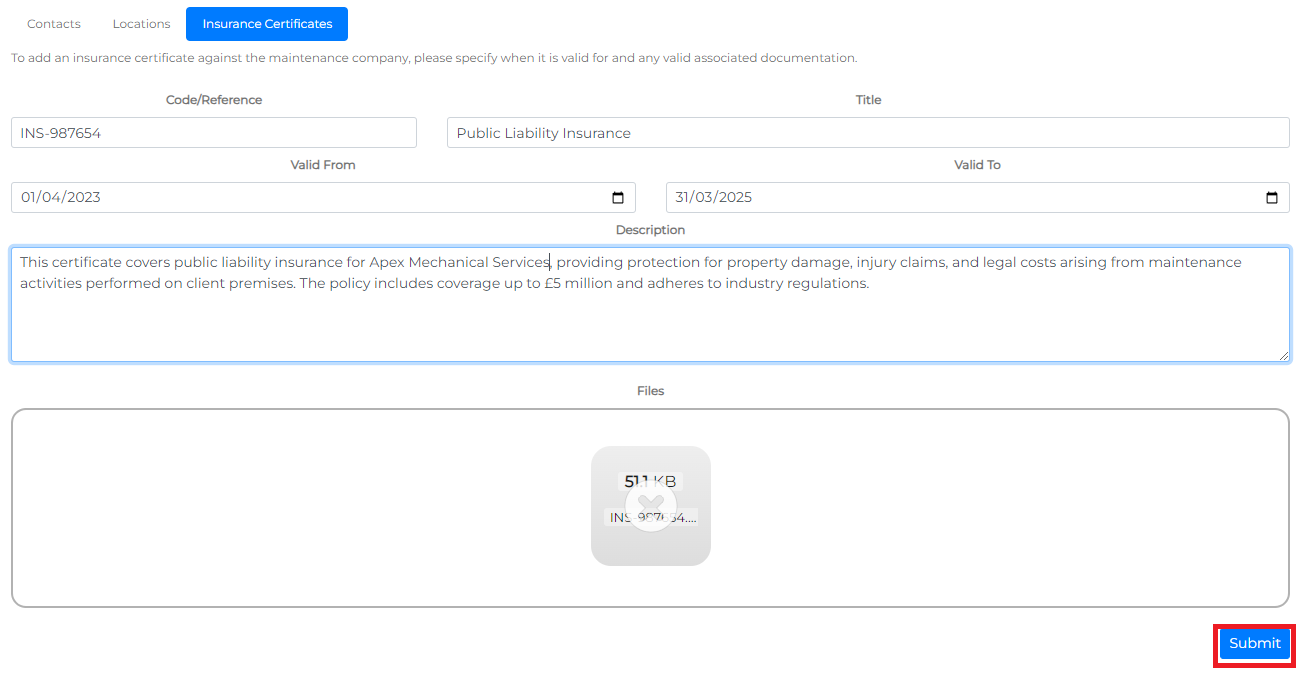
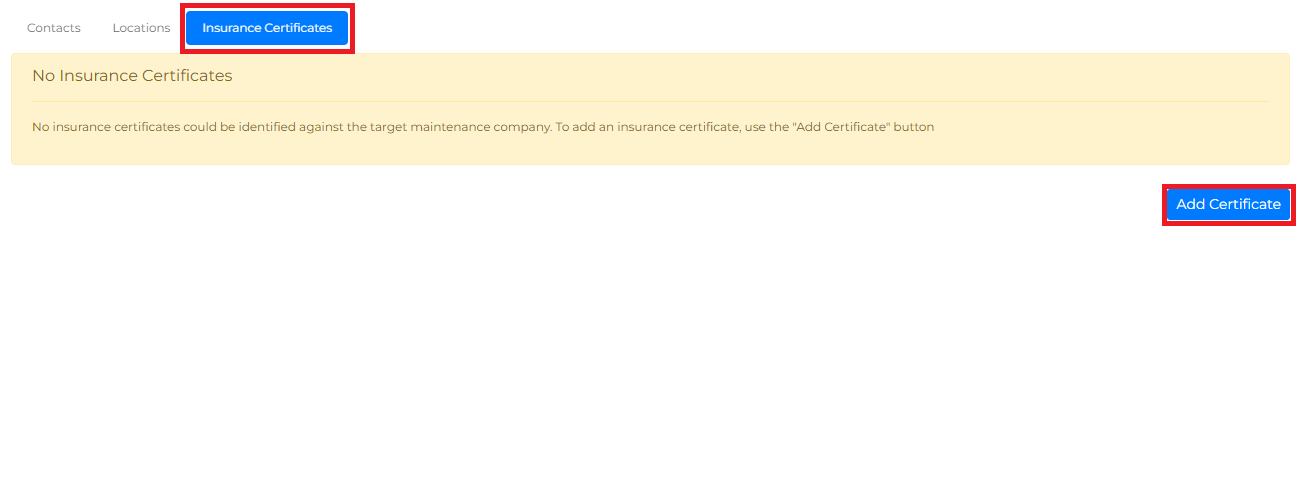
Manage Insurance Certificates
Insurance Certificates can be uploaded to a service provider from the Insurance Certificates tab.
Add an Insurance Certificate
From the add certificate menu, enter the following:
- Code/Reference – An internal reference for the certificate.
- Title – The name of the certificate being uploaded.
- Valid From date – The start date of the certificate's validity.
- Valid To date – The end date of the certificate's validity.
- File – Upload the physical document of the certificate.
You can either drag the file into the Files container or click the container to open your system's file explorer for selection.
Finally, click Submit to save the insurance certificate against the service provider.